Venting your range hood to the outside is strongly recommended for optimal air quality and safety in your kitchen. Properly venting removes grease, smoke, steam, odors, and other contaminants rather than simply filtering and recirculating them. This prevents grease buildup in your kitchen and helps control moisture that can lead to mold, mildew, and damage. Venting outside also reduces the risks of grease fires and carbon monoxide produced by gas stoves.
For all these reasons, building codes and standards like those from the International Residential Code (IRC) and Environmental Protection Agency (EPA) require venting range hoods directly outdoors. As homes have gotten tighter and better insulated over time and with larger, more powerful commercial-style ranges becoming popular, having proper ventilation is more crucial than ever.
Health and Safety Benefits
Venting contaminants directly outside has considerable health and safety advantages over recirculating range hoods that lack exterior ventilation:
- Reduces indoor air pollution from cooking fumes containing potentially hazardous gases and microscopic particles
- Lowers humidity and controls moisture that enables mold growth
- Less risks of kitchen grease fires spreading uncontrolled
- Limits carbon monoxide emissions from gas stoves in enclosed spaces
Over time, the improved indoor air quality promotes better respiratory health for your family.
Determine Needed CFM and Duct Size
Selecting adequate CFM airflow and matching duct size is essential for proper function. Consider the following key factors:
Stovetop Size and Power
The necessary airflow rate is indicated by CFM or cubic feet per minute. Choosing a hood with a CFM rating matched to the size and heating power of your cooking equipment is crucial. More spacious and powerful stovetops need greater CFMs to capture and vent everything efficiently.
As a general rule of thumb, you need around 100 CFM for every 10 inches of stovetop width. So a typical 30-inch stovetop needs a minimum of 300 CFM. Commercial-style ranges over 36 inches wide may require 600 CFM or more.
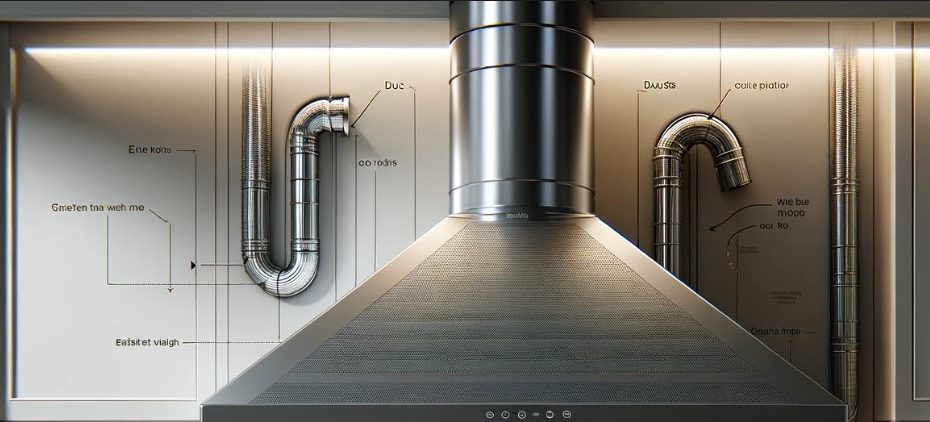
Duct Size
The ducting size must match the CFM level for optimal airflow without restrictions or bottlenecks. Many state building codes require smooth metal ducting sized at least 7 inches round or equivalent for under 300 CFM. Above that, 8 inches or more is often mandated.
Use an online duct calculator or check recommendations to determine the proper duct diameter and shape to handle your desired airflow based on straight equivalent length. Oversized is better than undersized.
Calculate the Total Equivalent Length
The total duct length and number of elbows, bends, and transitions affect air resistance. Each 90-degree bend equals 5 feet of straight duct length. Use fewer bends whenever possible and limit length to under 35 equivalent feet. Calculate the total equivalent length to size ducts correctly.
Evaluate Venting Route Options
Typical exterior venting routes include:
Roof Venting
Venting directly upwards through the roof is ideal for the shortest route and straight path outdoors. Attic routing is easiest for single-story homes. Pitch ductwork to allow drainage back down for condensation and grease.
Wall Venting
Venting horizontally through an exterior wall is simpler but has more air resistance. Keep routes as direct and short as possible. May require a decorative wall vent hood outside.
Soffit or Eave Venting
Venting through soffits or eaves under the roof overhang can work well. Usually needs an attic route unless one story. Keep duct routes short with minimal bends.
When evaluating options, always choose the most direct exterior path possible to maximize airflow efficiency. Prioritize routes limiting overall duct length, number of turns, and horizontal runs.
Select Appropriate Duct Materials
Rigid Metal Ductwork
Rigid metal is the gold standard for durability and smooth interior for optimal airflow, especially for roof venting. Stainless steel, galvanized steel, and aluminum are common choices. Sturdy round ducts limit leaks better than rectangular ones.
Flexible Metal Ducting
Flexible aluminum and stainless steel ducts are simpler to install, especially for wall or soffit vents. Cheaper but still durable and efficient. Can adapt to tight spaces and indirect routes.
Plastic Ductwork
Plastic or vinyl ducts are cheaper yet still UL-rated to meet codes. The main downside is durability – more prone to sagging and cracking over time. Only use rigid plastic types like PVC, not foam.
Duct Recommendations
Consult manufacturer guidelines on recommended duct materials and sizing. Get UL-listed, metal ductwork sized as described above. Follow any duct routing tips to maximize airflow and efficiency.
Installation Steps and Process
Proper installation is crucial for a long-lasting, high-performing venting system:
Cut Precise Holes for Ducting
- Carefully measure from the hood location to the exterior vent termination point
- Cut a clean hole of proper size through the roof, wall, or soffit for ducting
Securely Attach Ductwork
- Join ductwork pieces with sheet metal screws to fasten tightly
- Attach ducts securely to the hood and exterior termination point
Thoroughly Seal All Connections
- Seal duct joints with aluminum metal tape for an airtight seal
- Prevent any air or grease leaks for smooth airflow
Maintain Proper Slope
- Pitch roof/attic ducts ~1/4″ downward per foot to allow grease drainage
Install Exterior Vent Hood
- Install a decorative, protective wall or eave hood outside over the vent termination
Follow manufacturer instructions for safe, proper installation. Getting each step right ensures your venting system functions optimally for years.
Performing Regular Maintenance
Like any appliance, some periodic maintenance keeps your range hood venting well:
Clean Metal Filters
Grease residue buildup on reusable metal mesh filters slows airflow. Check and clean monthly in hot soap and water or degreaser.
Degrease Fan Blades and Housing
Thoroughly remove cooked-on grease inside fan blades, motor, and housing yearly using a commercial degreaser.
Inspect Ductwork
Check duct joints and seals regularly for any leaks or damage needing repair to maintain efficiency.
Replace Charcoal Filters
If using charcoal filters, replace them every 6-12 months as they lose effectiveness over time.
Following the manufacturer’s maintenance recommendations helps maximize performance and lifespan.
Conclusion and Summary
Installing and properly venting a kitchen range hood requires careful planning and step-by-step execution. But the considerable benefits for your home’s air quality, safety, and respiratory health make it well worth the effort and expense.
Though exterior venting adds complexity compared to recirculating models, it is the only way to effectively eliminate contaminants rather than simply filtering and recirculating them. Review local building codes to ensure your system meets all requirements.
Matching duct sizing to adequate CFM airflow prevents bottlenecks. Limit duct length and bends wherever feasible. Rigid metal duct materials are the most durable and efficient. Proper installation and regular maintenance keep the system performing optimally for years to come.